Wireless Tech Field 2 – Recap and first looks

This past week, I attended the Gestalt IT Wireless Tech Field 2 event hosted by several leaders of the wireless industry in San Jose, CA. The Tech Field day events are an opportunity for vendors and manufacturers to get in front of a highly focused group of delegates to tell their own story, on their own playing field. The Wireless specific event is the brainchild of Steven Foskett and Jennifer Huber and I consider myself privileged to have been able to participate in this very prestigious event – now for the second time! This event was sponsored by industry leaders in the wireless space – Aerohive, Meraki, MetaGeek, Ekahau, Aruba, HP, and Ruckus (in order of visit). The delegates for the event were given the opportunity to meet with these companies, in many instances at their home offices, to share first hand their stories and visions for what they feel is the market drivers in the wireless space as well as their respective visions for what the future of wireless is going to bring. This post will be the first of several as I dive into each of our sessions with many of the vendors and share my take on the vendors, their products, and how I perceive them to fit ‘in the industry’.

This Wireless Tech Field day was preceded by the first wireless symposium where members of the industry and media were invited to participate in an open discussion on the future of wireless with a focus in particular on upcoming technologies 802.11ac/ad (gigabit WiFi), 802.11u (Hotspot 2.0), and Bring Your Own Device (BYOD) technologies. Devin Akin (Aerohive), Carlos Gomez (Aruba), Paul Congdon (HP Labs), and GT Hill (Ruckus) treated us to their vision of how these topics will shape and form the foreseeable future in the wireless industry. I’ll also be exploring these various topics in upcoming blog posts, so consider that a teaser! πŸ™‚

Each of the sponsors of the WFD event each brought something special or different to the table. I think one of the most important things I learned during the event is that, when given the opportunity, each manufacturer tells a compelling story when given the opportunity to. I consider myself a fairly impartial technologist so it was refreshing to be able to receive these messages in their native, or ‘best case’ format highlighting the various strengths that each company has to offer:

Aerohive continues on their self-proclaimed mission to rid the world of controllers. Aerohive is rolling along with their ‘protocols are free’ mantra to bring solutions rapidly to market in a low-cost, easy to deploy fashion. Their cooperative control architecture enables many of the features of a centralized controller based solution and they are extending this into the routing world with the introduction of the BR-100 branch edge router. This device is managed ‘by the cloud’ – by either using the Hive Manager Online solution that is hosted by Aerohive or hosting your own ‘private cloud’ instance of the rapidly evolving NMS.

Meraki, to be perfectly frank, was perceived by many of the delegates as the ‘underdog’ of the event and many of us had some pretty negative preconceptions of who they were and what they do. I think it’s safe to say that Meraki portrayed a strong showing overall and rapidly showed the room at large that they’re clearly more than a niche player in the wireless space. They showed off their NMS platform and gave us some ‘under the hood’ insights into their operations overall. The way Meraki is able to manage and aggregate data from the vast (that word seems woefully insufficient) deployment of edge Access Points was staggering.

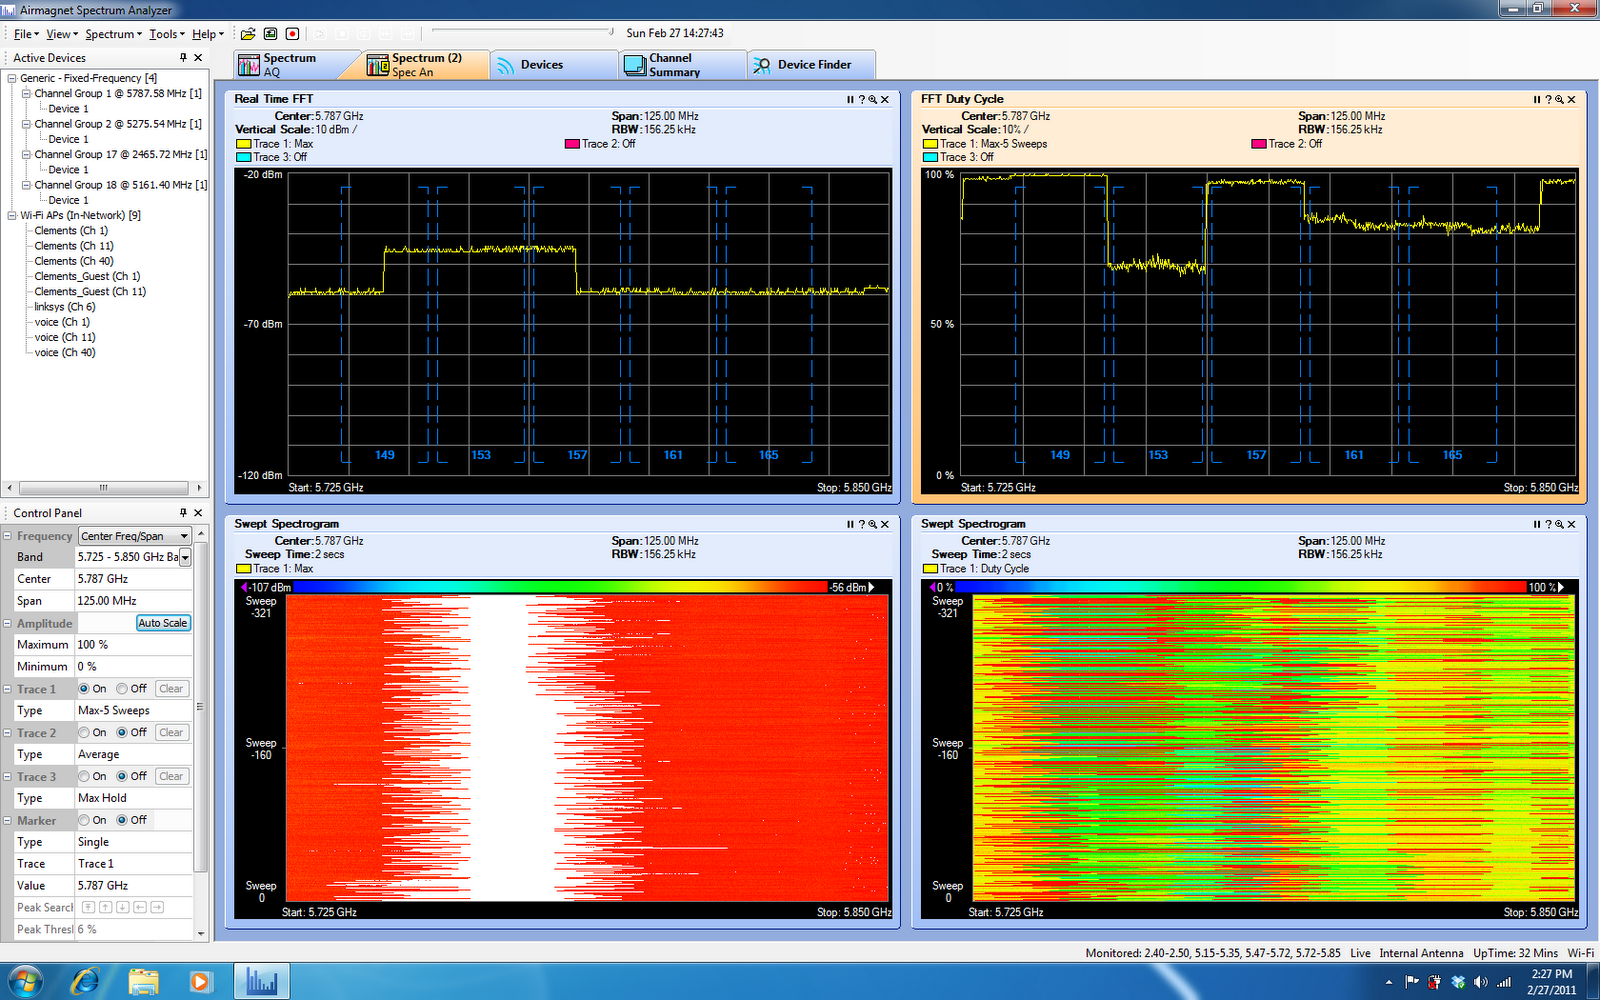
MetaGeek once again showed off to the TFD delegates. Last year at the first TFD event, they stole the show by showing off their low cost – feature rich PC based spectrum analyzer product. This year, demonstrating the agility that is impossible in a larger organization, they showed off their extension of ‘wireless visualization’ products – Eye P.A. This play on a TLA stems from their ‘eyeball’ view of Packet Analysis. As an organization that is clearly focused on getting information to a place that its easy to understand, they presented (showed off?) a pre-release version of this product. It’s safe to say that all of the delegates were blown away by the unique and innovative show of application development. MetaGeek has sprung up from seemingly nowhere to make a name for themselves in a technology that is exciting and that knows no growth boundaries.

Ekahau came to the table with their site survey product ESS (Ekahau Site Survey), the mobile version of their vision for tablet-based site surveys, and their tags. As an avid user of competing site survey products, I can clearly see that I’ll be rethinking my overall approach to performing the most important part of a wireless deployment – the site survey. I look forward to some hands on time with their android tablet compatible piece of this software. This is clearly a place that the major competitors are deficient in and Ekahau stands to be the first to market with an exciting product. Almost running out of time at the event, we got a very quick overview of their RTLS tag for wifi based deployments. As a side note to the Ekahau team directly, you have enough exciting things to talk about that maybe next time two sessions would be appropriate. πŸ™‚

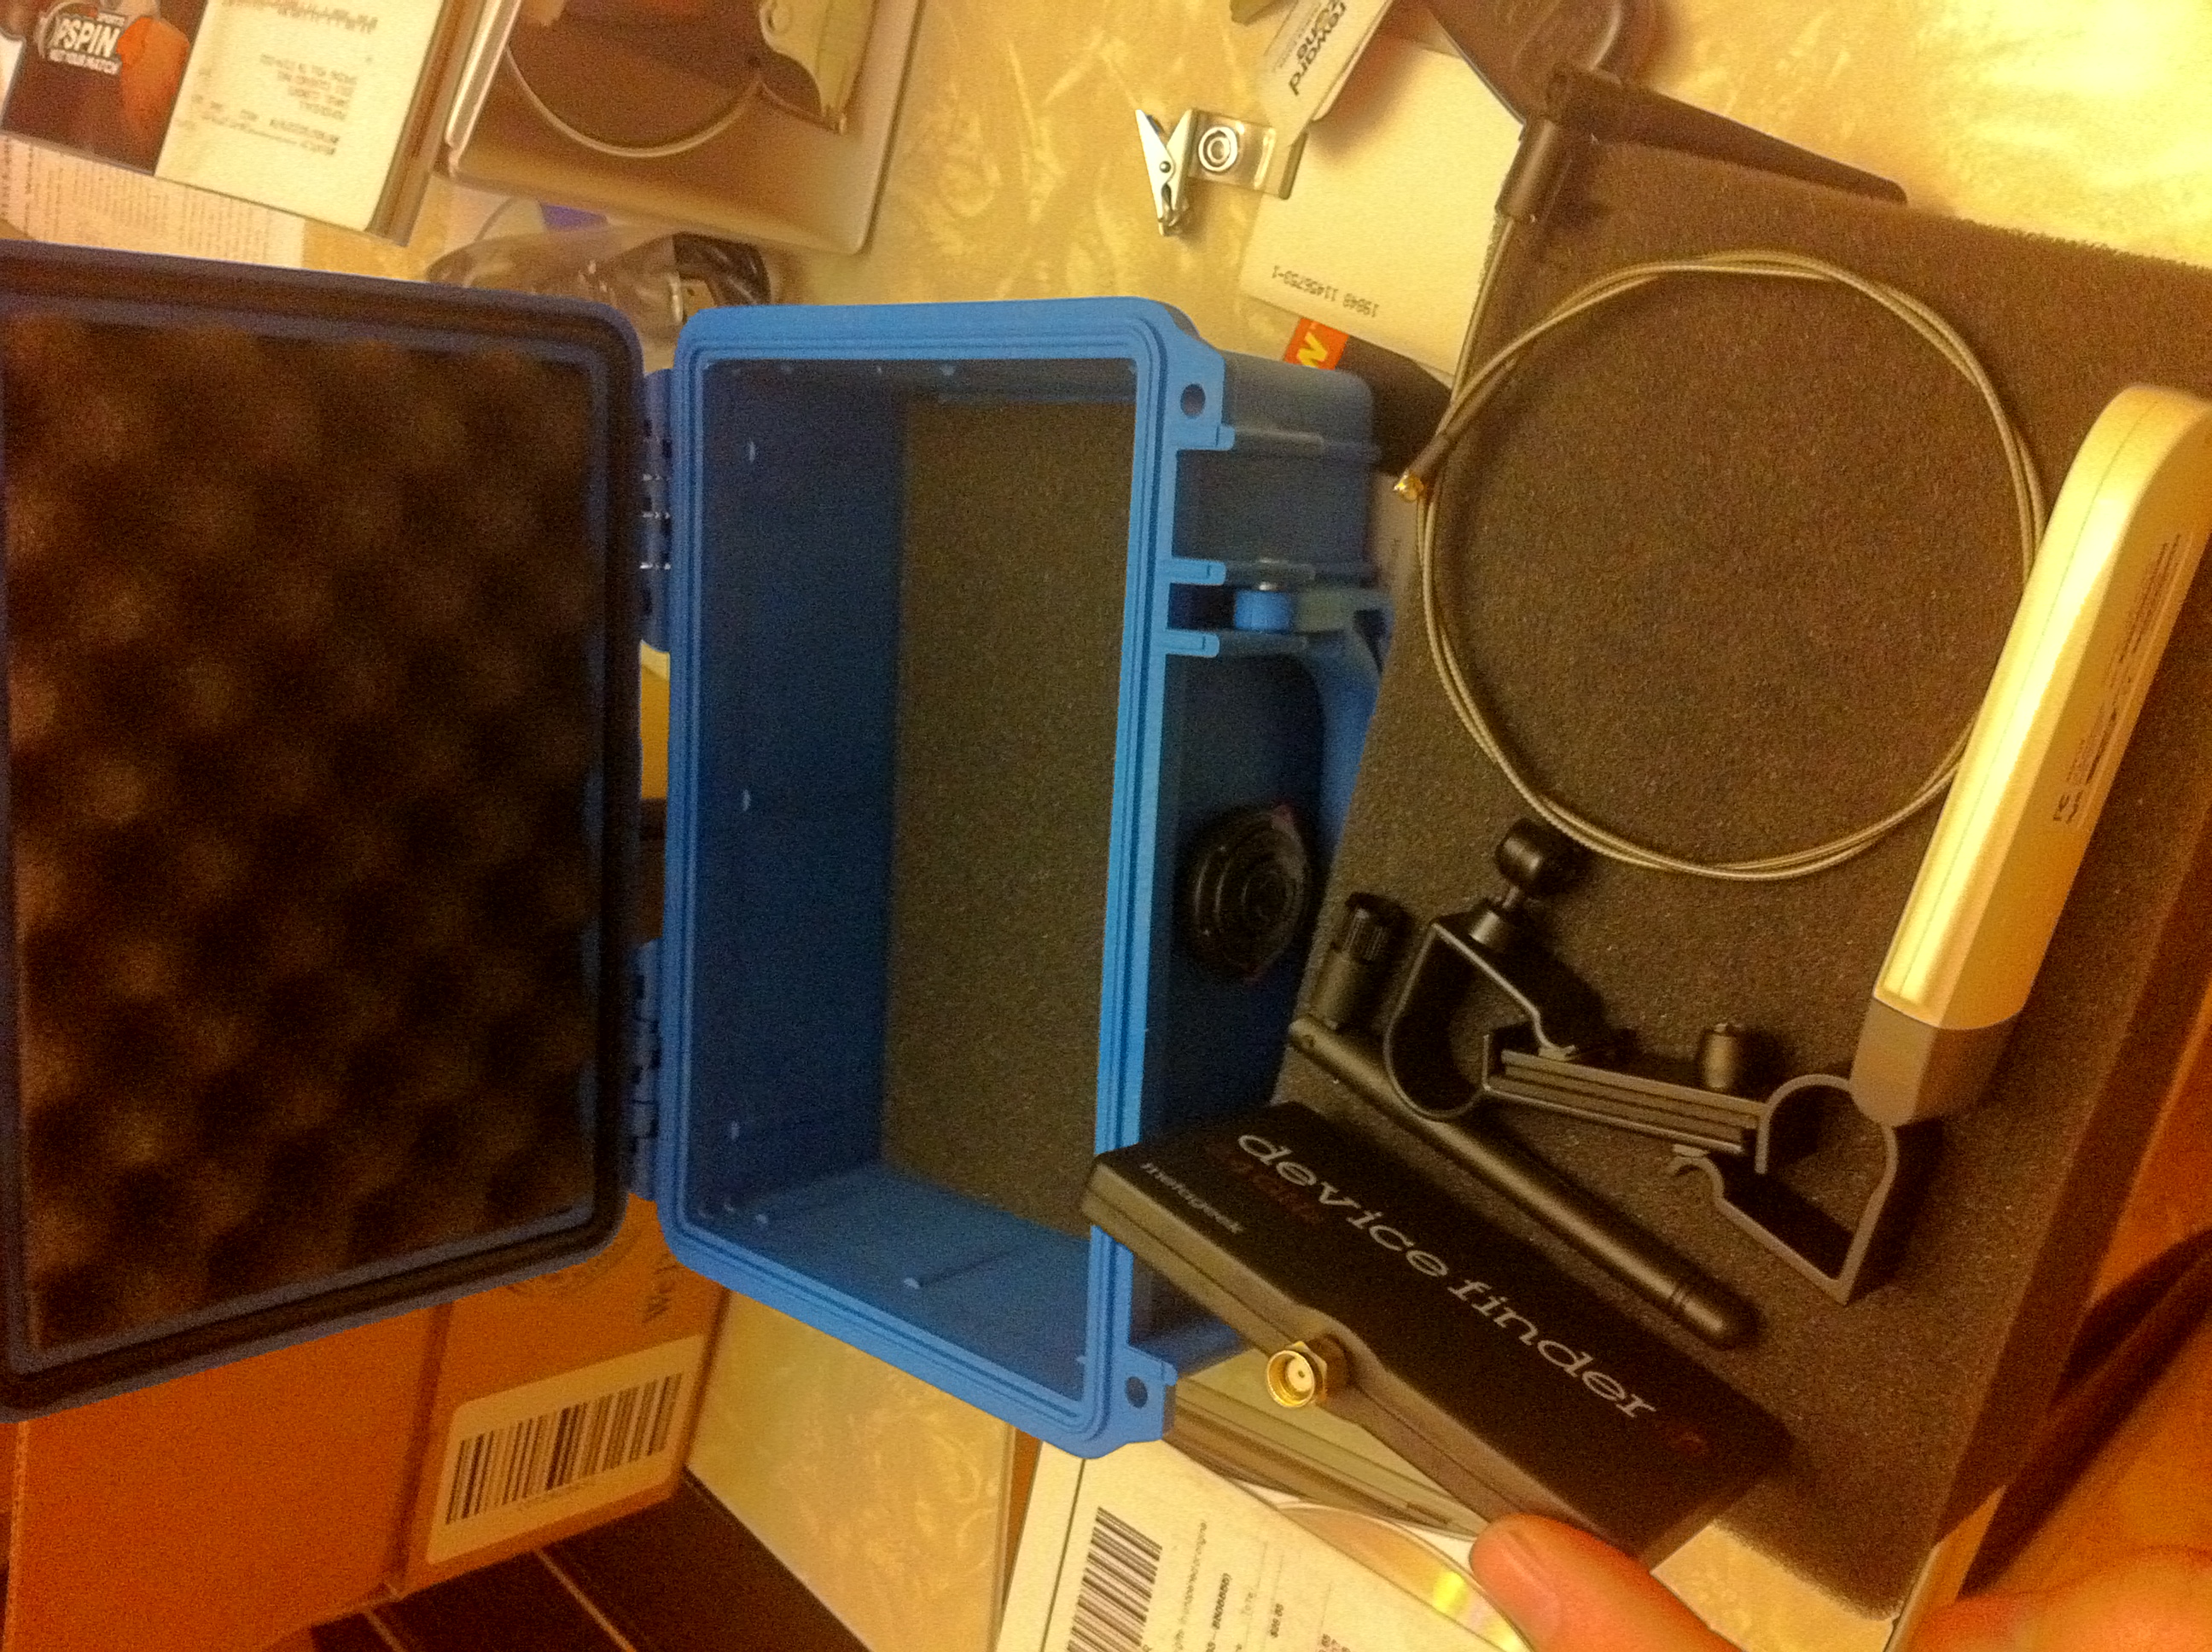
Aruba brought out the big guns during their sessions showing off their Aruba Instant product – essentially a wireless controller running on an AP. Those of you familiar with the now all-but-defunct WDS can consider this WDS in a fully automated, steroid enhanced feature set enabling rapid deployments of premise-based and managed lightweight deployments. After a good discussion regarding Spectrum Analysis, we dove off into the BYOD deep end with a realtime display of managing guest devices including a strong iOS MDM application utilizing products from their recent Amigopod acquisition.

HP gave the delegates a good overview of their 3×3:3 wireless Access Points including their newly launched outdoor product the MSM-466R. They also showed off their newest member of their controller line the MSM720 including some fervently discussed licensing features such as a discreet ‘advanced feature set’ as well as the ability to pool AP licenses across controllers.

Ruckus closed out the event with us by bringing a deep dive discussion regarding their approach to RF management. Ruckus gets top marks for their no holds barred approach to interacting with the delegates. Future sponsors of the event can take a page from their book – using a combination of geek + relevance to the table. Hands down, Ruckus had the room enthralled by the discussions and philosophies surround their approach to the market – no small feat for the last sponsor of the event.

Needless to say, the WFD event was exciting, exhausting, fun, and educational for everyone involved. As a delegate, I received a variety of products and marketing swag from the vendors with the understanding that I’m under no obligation to do anything with it that I don’t want to. The opinions that I intend to express from evaluating and trying out these products are my own and I’m also under no obligation to be positive or sway my opinion based on any gifts, equipment, or swag I have received. I look forward to digging deeper into these manufacturers and sharing what I feel and offering my honest, direct opinions on them. I hope you’ll stay tuned for future posts where I discuss the event, sponsors and products!

Come visit me at No Strings Attached Show

Along with several other WLAN professionals, come visit a new community where you’ll see much more information than I can possibly post here by myself! Fear not – I’ll still share here and occasionally cross-post, but you should take a few moments and go here. Now. πŸ™‚

-Sam

Thinking of upgrading to Cisco NCS?

Cisco recently released Cisco Prime Network Control System (NCS), an update to their Wireless Control System (WCS) NMS. This update brings with it Ciscos first attempt at integrating wireless with wired management as well as network client visibility with ISE. You’re going to want to carefully consider upgrading – since many of the new features may not be applicable to all users. Among the most highlighted features are pseudo-switch management, unified client tracking with ISE/MSE, streamlined UI, and dynamic RF heatmaps (using AP to AP RSSI values). Aside from these, NCS is basically a glorified UI laid onto of WCS. Those of you familiar with the current pain of WCS profiles, templates, and the lovely flash/java map editor will be relieved to know that all of this still exists as it is in WCS 7. Aside from the glossy front end, if you’re not using Cisco switches, ISE/MSE, or some of the refreshed reports, you’re basically getting the benefit of dynamic RF heatmaps. If you’re considering migrating from an existing WCS installation to a shiny new NCS installation, there are a few potential pitfalls that you should be aware of.

Virtualization: If you’re like many WCS users, you’re probably running WCS in a virtual 2003 or RedHat Linux server. NCS comes as an all-in-one package .OVF to load into your VMWare infrastructure. Those of you familiar with Virtual Appliances will know that this particular distribution method is intended to make distribution of Virtual Appliances easier – including all of the settings you’re going to need to setup the VM. This includes CPU allocation, RAM allocation and Hard Drive space. This is a deviation from the way you may be used to. Instead of asking your Data Center team (if you have one) to carve out a 2k3 or RedHat server, and give you remote access into it for you to complete the WCS install, you now have to give them the OVF file and ask them to run through the initial setup. To make things interesting, there are three different OVFs to choose from: small, medium and large.

Small: 2 CPUs at 2.93GHz or better, 8G of RAM, 200G Hard Disk

  • 3000 Lightweight Access Points
  • 1000 Standalone Access Points
  • 1000 Switches
  • 240 Wireless LAN Controllers

Medium: 4 CPUs at 2.93GHz or better, 12G of RAM, 300G Hard Disk

  • 7500 Lightweight Access Points
  • 2500 Standalone Access Points
  • 2500 Switches
  • 600 Wireless LAN Controllers

Large: 8 CPUs at 2.93GHz or better, 16G of RAM, 400G Hard Disk

  • 15000 Lightweight Access Points
  • 5000 Standalone Access Points
  • 5000 Switches
  • 1200 Wireless LAN Controllers

The most significant challenge you’re going to have here is that you have to select the correct sizing prior to doing your installation since there is no way to migrate from one size to another post-installation aside from backing up and reinstalling your databases.

Licensing: If you’re an upgrade customer, there is a fee you’re going to have to pay for the ability to upgrade to NCS. Once you’ve gotten upgrade fee taken care of, you migrate your existing WCS licenses to NCS. The rub here is that NCS licensing is based on the UDI of the VM as opposed to the hostname of the VM as it was in WCS. This is an install-time generated value and will be different for every VM instance. This means that if you size your VM incorrectly (as described above) and you re-install it, you’ll have to do the licensing dance to get your install up and running again. There will be a limit to the number of times you can re-issue a license so this only stresses the importance of getting your sizing done correctly upfront.

Clients: NCS does not support Internet Explorer without the addition of another plug in. We’ve been utilizing IE for managing WCS along with the Flash plug-in for years now so the addition of the Google Chrome plugin to get IE to work correctly may seem like minimally troublesome, there are numerous corporate, educational, and government users with some pretty restrictive software requirements on their PCs. If you do not have access to a PC with either the supported Firefox or IE/Chrome plugin combo, you will not be able to utilize NCS.

Switch management config: In order to ‘manage’ your switches, you’ll need to have SNMP credentials defined on all of your existing gear before you add them. Shouldn’t be a huge problem if you’ve been diligent about your deployments or if you’ve been using another NMS to do your configurations. As of now, the switch management is visibility only to the hardware and clients if you’re using an MSE. If you’re using an MSE to track wired clients, you’ll also need to enable NMSP on your switches then sync them to your MSE. While this may seem like minimal effort, this does require a fairly current version of IOS and the command:
nmsp enable
if you’re adding this along with all of your relevant Civic information data bits, this could be significant effort especially if you have a significant number of switches.

Evaluation licenses: Be very cautious about using evaluation licenses to get your NCS install up and running. When you first log into NCS, if you don’t have a valid NCS license, you cannot do anything prior to adding a valid licenses. If, during your evaluation of NCS, you have another infrastructure component running an evaluation or time expiring license, you must be cautious of your NCS license expiring at the same time as your other evaluation licenses. This will throw you into an endless loop of NCS redirecting you to the NCS license page then redirecting you back to your feature license expiring.

In all, NCS is a welcome refresh to the WCS product line, and a reasonable first stab at unifying the UI across several product lines (hence the Prime name) so go grab yourself an evaluation license from here and see it for yourself!

Resurrecting a bricked NM-AIR-WLC6

Cisco recently posted this addendum to their Software Downloads section for the Cisco Wireless LAN Controller Module:

Warning: the Wireless LAN Controller Network Module (NM-AIR-WLC6-K9) is not supported in any software release after 4.2.209.0. Attempting to install 5.0 or later software can permanently damage the module.

This is a pretty recent addition and appears to have been an oversight the past year or so while they’ve been happily releasing version after version of NMWLC code without this disclaimer. If you’re like me, you’ve been keeping up on your latest and greatest software releases and you may find yourself in some murky waters if you happen to have this module. Where I landed was a module that would boot fine, but would not establish any network connectivity (management, AP join, etc). You should note that this article in it’s entirety does not apply to the NME module, just the NM. The NME module has more memory and a 1G internal interface to the ISR, the regular old NM has less memory and only a 10/100 interface. You can tell which module you have by looking at the silkscreen on the back of the module or by doing a ‘show sysinfo’ at the CLI of the controller.

This article is not supported by Cisco, TAC, or myself. You may further damage your NM if you proceed. This article is not for the faint of heart and will most certainly void any warranty you may have. If you have a bricked NM under SmartNET, you should contact TAC for a replacement unit, not follow the directions in this post. I do not guarantee any work here and you can severely damage your module, it’s flash, or your PC. Read and follow this article at your own risk!

Now thats out of the way, the specifics of my problem landed me in a situation where I could not roll back the version of code on my flash (not having network connectivity really limits you, I gotta admit). You may find yourself with a corrupt flash, unable to boot, or other general mayhem. Once Cisco released this notification, it dawned on me that the version of code on my flash was likely the culprit. Since the NMs are basically an Pentium III with some memory and a flash to boot off (similar to the CUE or Content Engine modules) running Linux, I figured I should be able to copy the flash from a good NM and I’d be back in business. Having located a donor NM (thanks to Robert B. for his support here), I assembled Β the following items to move on:

  • Donor working NM to rob/copy the flash off of
  • A small screwdriver
  • Old laptop with Cardbus/PCMCIA slot
  • CF to PCMCIA adapter (like one of these)
  • USB Flash drive larger than 256M formatted something that Linux can write to
  • A Linux distribution that I could boot off of CD like DSL
  • A static bag to work off of
Getting a donor module
The first thing I did was to remove the CF module from the donor NM.
Step 1) Place the donor NM on a static safe work place. The bag it came in would be good.
Step 2) Confirm that the module you’re working on is an NM, not an NME.
Step 3) Locate the cover that hides the flash module.
Extracting the flash
You must then remove the protective cap around the flash module.
Step 1) Unscrew the CF housing.
Step 2) Lift up gently on the right edge of the cap and it should fall off the module.
Remove the flash from the NM
Gently grasp the Cisco flash module by both edges and pull it directly out of the NM.
Insert the flash module into your CF reader.
This should be pretty straightforward.
Once you have the flash module in a CF reader, we’re going to be focused on getting a good block image off of it. The rest of this article will discuss how to take an image of the flash module and store it on a USB flash drive. Once you have your favorite LiveCD of Linux (or BSD if you prefer) downloaded, boot your old laptop off of it. We chose a LiveCD release so that we can do this on a laptop without having to do a fully blown installation of Linux just for this one project. Feel free to use any sort of Linux box you happen to have laying around. πŸ™‚
Once you’ve successfully booted Linux, you’ll need to open a terminal window. In DSL, there is a link to the Terminal app in the bottom left corner.Β Attach your USB drive and insert your PCMCIA flash reader once your system is booted and your terminal is up.
Type:
sudo su


Β Β -This puts us into super-user mode so we don’t run into any permissions issues
Then:
dmesg


Β Β -This gives you a dump of system messages. In particular we’re looking for two things. The USB drive and the CF adapter. In my system, this looked like:
<6>hub.c: new USB device 00:1d.1-1, assigned address 3
<6>scsi2 : SCSI emulation for USB Mass Storage devices
<4>  Vendor: USB 2.0   Model: FLASH DISK        Rev: 1.0
<4>  Type:   Direct-Access                      ANSI SCSI revision: 02
<4>Attached scsi removable disk sdb at scsi2, channel 0, id 0, lun 0
<4>SCSI device sdb: 2033664 512-byte hdwr sectors (1041 MB)
<4>sdb: Write Protect is off
<6> sdb: sdb1
This tells us that our flash drive is at /dev/sdb1 (the last line above) so let’s mount it using:
mount /dev/sdb1 /mnt
Next we look for our flash reader. In my system, this looked like:
<6>cs: memory probe 0xa0000000-0xa0ffffff: excluding 0xa0000000-0xa0ffffff
<6>cs: memory probe 0x60000000-0x60ffffff: clean.
<4>hde: STI Flash 8.0.0, ATA DISK drive
<4>ide2 at 0x100-0x107,0x10e on irq 11
<4>hde: attached ide-disk driver.
<6>hde: 501760 sectors (257 MB), CHS=980/16/32
<6> hde: hde1 hde2 hde3
<6>ide_cs: hde: Vcc = 3.3, Vpp = 0.0
For this one, we’re not interested in any partition information like we were on the USB device, we’re just interested in the device name. Here, we see that this device is hdeΒ (the beginning of the third line)Β . Once we have both the USB drive mounted and the flash drive identified, we’re going to use dd to take a block image of the device by typing:


dd if=/dev/hde of=/mnt/sdb1/nm.image
This deconstructs like this:
Β Β -dd is the name of the application we’re going to use to take the image.
Β Β -if=/dev/hde tells dd that the input file is the device of /dev/hde (our CF).
Β Β -of=/dev/sdb1/nm.image tells dd that the output file is a file on our USB drive called nm.image.


This will take some time since we’re reading the CF block by block and writing it out to the USB flash drive. The resultant image will be the same size as the CF (257M in this case) since it’s copying everything – data, unused bits, partition info, etc.
Once the read of the flash is complete, you should be back at a command prompt. You can confirm that it’s there and the right size by typing:
ls -lh /mnt/sdb1


Shutdown your laptop by using:
halt


Eject the CF adapter and re-install it into your donor NM following the instructions in reverse. Once you’ve put away your good hardware, shutdown your ISR with the bad NM, remove it out of the ISR, and extract the flash out of it as described above. Insert it into your CF reader as described above, boot your laptop as described above, insert your devices (USB and CF) into the laptop as described above, and open the terminal application as described above.


Once you’re at your terminal prompt, we’re going to do the following:
Type:
sudo su


Β Β -This puts us into super-user mode so we don’t run into any permissions issues
Then:
dmesg


Β Β -This gives you a dump of system messages.Β Look for your USB device and CF device like you did before and confirm they’re there.
Now we’re going to take our image that we created above and write it out to our bad flash:
dd if=/mnt/sdb1/nm.imageΒ of=/dev/hde


This deconstructs like this:
Β Β -dd is the name of the application we’re going to use to take the image.
Β Β -if=/dev/sdb1/nm.image tells dd that the input file is a file on our USB drive called nm.image.
-of=/dev/hde tells dd that the output file is the device of /dev/hde (our CF).


This will take some time as well since we’re now reconstructing all of the data bits back onto our module. Once that completes, shutdown your laptop by using:
halt


Once it’s powered off, you should have a complete copy of the flash from your donor module in your hands. Reassemble your module and re-insert it back into your ISR. Power it all back on and you should be able to use:


service-module wlan-controller 1/0 session


to confirm that your module boots successfully. One of the more obvious side effects of this is that you’ll loose your NM configuration and you’ll have your donor NMs configuration now on yours. You’ll want to watch the card boot and do a clear config first off to ensure you have a good starting point. If you don’t have a donor NM to get this process done, you may want to look around to see if anyone else in your situation has the data bits from the dd process above. Once you have an extracted image, this should work on any of the like platforms regardless of where it came from.

Cisco WLC LDPE Images

With the release of WLC code version 7.0.116.0 (otherwise known as J MR1) came a slew of new features despite the MR tag. Among those images is one that is sure to cause a significant amount of confusion – especially those that may not be familiar with the dance that is Cisco software images. That feature is Licensed Data Payload Encryption (LDPE). Data Payload Encryption allows for the data that travels between the Access Point and the WLC to be DTLS encrypted. This is normally not done. Once client data is transmitted to the Access Point, the Access Point will decrypt it (this is your traditional WEP, TKIP, AES-CCM), then tag it to the correct VLAN (if applicable) and send it on it’s unencrypted merry way! If you have a need to encrypt the data on your wire – for example, if you’re joining Access Points to your controllers across a public Internet connection, this feature is what you need. This used to be an optional (paid for) feature that was included in the WPLUS license, but this was rolled into the base WLC license and is now available free of charge on all modern WLC platforms. It should be noted that if you’re using 2000, 2100, 4000, 4400, ISR modules, or WiSM 1 platforms, these do not support encrypting your data payload and none of this article is applicable to you. πŸ™‚

There are two different implementations of this feature – one that is an all inclusive image, one that is a separate image. Depending on the platform you’re using, you get one of those.Β If you are upgrading a 5500 WLC to J MR1, this is likely where you’re going to run across this for the first time which is the two image variation. On CCO, you’ll find two images:

  • AIR-CT5500-K9-7-0-116-0.aes
  • AIR-CT5500-LDPE-K9-7-0-116-0.aes

The image that requires a license to enable this feature is the second LDPE image.

Which one do you need?

The most straightforward answer to this question is that if you did not specifically purchase a 5500 with the LDPE image, you cannot install the J MR1 LDPE image onto it. This means that if you’re upgrading an existing installation, you have one choice – the ‘regular image’Β AIR-CT5500-K9-7-0-116-0.aes.

The second place you’re likely going to run into this image is when you’re quoting a new controller. To decide which image you should select is going to take a bit more thought and to come up with an answer, you should probably know why the heck Cisco split this feature out to begin with. This all boils down to regulatory restrictions in Russia. So, the short version of your thought process should be, “If I’m not installing this WLC in Russia, I shouldn’t be selecting the LDPE image version”. If you are indeed selecting this version, the license itself is a $0 option, but does need to be discreetly selected.

Now, if you’re ordering a new 2504, WiSM2 or 7500 WLC, you don’t have to select a different software image, but you do need to select the $0 license if you want this feature enabled:

To wrap up, if you’ve got 5500 controllers running today, Cisco made it so you cannot install the LDPE image, so move past it when you’re doing your code upgrade. If you’re ordering new, and not in Russia, make sure your VAR/partner gets the correct DTLS license for you!

Securing your small WiFi tools

I find myself lugging around a variety of tools recently – more so than I usually do courtesy of #TechFieldDay. While I typically carry a Spectrum Analyzer, it is usually one of those ‘dedicated pockets in the laptop bag’ kind of tools that gets packed in with my trusty CB21AG survey card. Those of you keeping notes would realize that any machine purchased in the last 3 years or so is lacking a CardBus slot so we’ve been relegated to keeping our old machines around for compatibility with our trusty tools or using a clunky ExpressCard to CardBus adapter if we want to keep compatible. This works okay if your new machine sports a shiny new ExpressCard slot but those of us moving (back) to the Mac platform and not wanting to chunk out the change for a 17 inch Mac Book Pro which has the coveted ExpressCard slot but weighs a ton (not good for survey work!).

The answer? USB. Most everything has a work-alike or a preferred card that is USB so I find myself with:

Orinoco 8494 card for the AirMagnet products (Survey, and WiFi Analyzer)

MetaGeek Wi-Spy DBx with device finder antenna

AirMagnet Spectrum XT

and to round it all out, a Ralink (thanks @sevanjaniyan)Β based adapter for compatibility with WildPackets Omnipeek for next weeks CWAP Beta class!

The challenge: All of these things have been rolling around in my bag (in the WiSpy DBx box actually) which is a less than graceful way to treat your tools. I needed a sturdy case that could hold it all and not be so large I wouldn’t want to pack it wherever I went. Enter the Pelican 1120 case. With inside dimensions ofΒ 7.25″ x 4.75″ x 3.06″, it’s the smallest ‘small case’ they make. Being a fan of the larger 1510 case for my survey gear, and being priced (with shipping) for a modest $35, it was pretty well a done deal. Pictures of my handywork (pick and pluck style) to follow:


Hands on with the AirMagnet Spectrum XT

AirMagnet Spectrum XT is the second generation of spectrum analyzers to carry the AirMagnet name. The XT is a USB connected device whereas the previous model was a 32-bit CardBus version (OEM’d from Cognio). AirMagnet was gracious enough to host a session at the recent Wireless TechField Day event and we got to spend some quality time with the AirMagnet team discussing the WiFi Analyzer (protocol analyzer) and the Spectrum XT product.

Begin RF Background (okay to skip if you’re a seasoned Wi-Fi guru): WiFi (802.11a/b/g/n) runs in frequencies that are unlicensed by regulatory bodies. Here in the US, that is the FCC. This generally means that anyone can do anything they want in those ranges and they commonly do! People running non-WiFi devices in the 2.4 and 5GHz spaces can often cause interference for wireless networks causing poor performance, intermittent connectivity, or outright failures of wireless networks – especially in the very crowded 2.4GHz range. End RF Background

This being the second iteration of Spectrum Analyzers from AirMagnet, much of my opinions come from using the previous model which was OEM’s from Cognio. Cognio was acquired by Cisco and the old product was relabeled the Cisco Spectrum Expert. All 3 of the CardBus products (Cognio, AirMagnet, Cisco) share a similar (same) codebase and the new Spectrum XT product appears to be a rewrite from the ground up. This brings with it a new interface into the product including views such as the Spectrum Density view. This also brings some quirks for those of us that are familiar with (expecting) one or features from the old application. The USB form factor was easy to manipulate and a welcome change from the CardBus only solution that has forced many of us to resort to the cumbersome ExpressCard to CardBus adapters.

Spectrum Analyzer CardBus with Spectrum XT USB

Spectrum Analyzer CardBus with Spectrum XT USB

The AirMagnet dance of acquiring a license, User Access Control dialogue box, unsigned drivers and no ‘proper’ SSL cert on their My Airmagnet site aside, the installation was relatively straightforward on my Mac running Fusion and Windows 7. It should be noted that in this configuration, Spectrum XT has no direct access to the built in WiFi adapter on the Mac so you’ll either need to reboot into BootCamp or attach a supported USB wireless adapter to be able to pickup SSIDs.

None of us like dealing with SSL certs, but seriously?

UAC Errors are so Vista... I know you can work around them, but should you *have* to?

The main interface of the application sports numerous easy-to-digest views including the new Spectrum Density view, a Real Time FFT with Avg, Max, and Max-Hold views, and the Spectrogram (historical waterfall) view. The less obvious components of the screen along the left side reveal some pretty important data being hidden such as the Duty Cycle listed per-channel and the Interferers and Devices pane. As you can see from my screenshot, I must be doing something wrong because there is a tab for Bluetooth devices and my Bluetooth device isn’t showing up there – it’s showing up in the Non-WiFi Interferer tab. Clearly there is at minimum some ambiguous terminology here that must be explored further – this didn’t seem to be the case with the Cognio card.

Easy to read even if the Bluetooth is sorted wrong.

The card is a touch on the wide side so if you have USB ports that are close together, you’ll want to use the included USB extension cable or a 3rd party USB hub. If you’ve got a Mac setup, it should be noted that with a USB hub, you can easily attach a supported wireless adapter and have a fully functioning product running within a VM.

The addition of SNMP integration makes this application easy to plug into monitoring systems to to trap out to. A nice addition for those of us looking to leave something in the field at a remote location for a few days to ‘watch the air’. Integration with the AirMagnet Survey pro application rounds out the major feature list. Those of us that survey using AirMagnet products, this is a must have for Spectrum integration during surveys.

There is a short list of conspicuously missing features that reveal the somewhat young state of the application – especially if you know and love the CardBus products. Those are exporting your interference devices list and the ability to modify your views to the n-th degree. Expect a slight learning curve for those new to the product. The XT product appears to only allow a max of four displays whereas the legacy product would allow for as many as could fit your screen (I typically used 6 depending on the environment). These outstanding seemingly cosmetic issues I expect will be fixed eventually, but do make sure your support contracts are up to date – AirMagnet can be especially finicky about version releases and they appear to have moved to the traditional AirMagnet licensing scheme (a la Survey Pro and WiFi Analyzer) and away from ‘the card is the license’ that the last product used. Those of us that travel with every tool installer handy (for those sans-Internet times), make sure you download an extra copy of your .lic file and keep it with the app!

AirMagnet Spectrum XT product page

Gestalt IT (Tech Field Day organizers)

In all, the Spectrum XT is a great spectrum analyzer with a slightly different application from the previous model. This means that it’s not going to be a drop-in replacement for those of you looking to move off of the CardBus model – especially if you export identified devices for inclusion into your site-survey report. I’m hoping that these features come soon (I’ve provided this feedback to AirMagnet) and when these and a few of the other last few software tatters get cleaned up, I expect this to become the defacto enterprise-grade survey product.

Editors note: After contact with AirMagnet, the ‘device export’ function is apparently being addressed and should be available in an upcoming patch.

Full disclosure: I was a delegate for the first ever Wireless Tech Field Day event organized by Stephen Foskett and GestaltIT This event was sponsored by Meta-Geek as well as other presenters including payment of accommodations for all delegates. Evaluation product was distributed to delegates for hands-on exposure for this review without promise or commitment to provide any feedback, positive or negative. Professionally, I work for a VAR which provides services for industry leading technology manufacturers. The views expressed on this blog are my personal opinion and do not necessarily reflect opinions my employer.

Hands on with the Metageek Wi-Spy DBx

MetaGeek’s Wi-Spy DBx is a small form factor spectrum analyzer which gives you visibility into the 2.4 and 5GHz spectrums allowing you to readily identify sources of interference that may be present. I was fortunate enough to spend some time with Ryan Woodings and Trent Cutler from MetaGeek while at the Wireless Tech Field day recently and they gave us the grand tour of their product lineup – hardware and software! Those of you familiar with WiFi technologies (802.11a/b/g/n) know that the frequencies they run in are unlicensed by regulatory bodies (here in the US, that means the FCC). This means that anyone can do anything there and they commonly do! People running non-WiFi devices in the 2.4 and 5GHz spaces can often cause interference for wireless networks causing poor performance, intermittent connectivity, or outright failures of wireless networks – especially in the very crowded 2.4Ghz range. Moving beyond the insight provided by such tools as inSSIDer which can only tell you about WiFi specific data, the Wi-Spy DBx allows you to visualize and identify non-wifi signals such as bluetooth devices, microwave ovens, analog video cameras, and other such obnoxious or potentially damaging signals.
MetaGeek offers a few devices and knowing what you’re looking for in what frequencies is important to selecting the right one. The Wi-Spy 900 is targeted at those looking for devices in the 900MHz range which is not useful to those of us living in the WiFi space (2.4 and 5GHz). Most readers won’t be interested in this but it’s included for completeness. The other three devices that are relevant to our WiFi space are the WiSpy 2.4i, WiSpy 2.4x and the WiSpy DBx. The two 2.4 units are fixed frequency (2.4GHz only). The 2.4i model comes with integrated antennas and the 2.4x comes with a detachable antenna (more on this feature shortly). Both of these units are appropriate for people looking at devices that only support 802.11b/g/n(2.4). The WiSpy DBx allows us to look into the same 2.4GHz spectrum as the i/x models, but also includes visibility into the 5GHz range for those of us looking at 802.11a/b/g/n across the board. With the prevalence of 802.11a devices in many ‘business grade’ laptops and with many 802.11n deices supporting the cleaner 5Ghz frequency, the DBx allows us much greater flexibility and insight into those spaces. Being a very small USB-connected device, it’s about the size of 2 AA batteries, includes an external RP-SMA connector, and a dipole antenna for instant ‘out of the box’ usability. The RP-SMA connector and antenna configuration allows you to remove the included antenna and attach an optional directional ‘device finder’ antenna. The intention here is that if you’re trying to track down an obnoxious source of interference, you can use the external panel antenna to sweep back and forth in an area to see where the signal gets stronger or weaker. Using this method, you can get much closer to ferreting out anything that avails you!Β 
MetaGeek offers 4 main applications for using their WiSpy devices, the main Chanalyzer application, and Lite, Pro, and Lab versions allowing for a diverse lineup for most any need. The Lite application is for the 2.4i hardware and is otherwise not a part of this review. The main Chanalyzer application is currently at version 4 and is included with the 2.4x and DBx hardware. The bundled application gives you a jumping off point for getting started with spectrum analysis and gives you the familiar ‘squiggly line’ interface as well as some pretty nice approaches to displaying data. The Max/Min and Current display views give you a one-stop glance and utilization in your spectrum for easy to digest and understand information. Chanalyzer also gives you the ability to record data for future review (or submittal back to MetaGeek!) is a feature that allows you to take a snapshot of where you’re at and review it later offline or take it to a friend that may be more fluent in spectrum analysis. With a database of silhouettes to overlay ontop of your view, you basically mix and match patterns of what is live in your environment against known or common interferes. This gives you a pretty straightforward way to identify the type of devices you’re looking for so you can narrow down if you should be hunting high for video cameras or low for microwaves.
The Chanalyzer Pro application gives you richer insight into your environment with the addition of a waterfall view along the left pane of the application. You use this to navigate through time as a running tally over the length of a capture. The addition of the new duty cycle view gives you a straightforward view of ‘consumed airspace’ and several other features such as device finding (recommend using the device finder antenna attachment for this!) as well as a very flexible report builder round out this application for those looking to ‘step up’ from the default Chanalyzer application. At $499, those looking to start offering ‘commercial grade’ reports and services to customers, this is right up your alley. As an additional incentive, MetaGeek offers a $99 savings when purchased with the DBx hardware so if you’re thinking this is where you’re going to end up, and you can stomach the extra $300, keep that in mind.
Those of you looking for the geek-out application will be interested to know that MetaGeek is also offering Chanalyzer Lab which allows you to fidget with the hardware knobs inside the analyzer hardware. This application isn’t for everyone but is indispensable for those looking for much more granularity into frequency and amplitude data. MetaGeek has made this application quite affordable at $99 so those of you looking for an environment rich in tweaking and tuning, or if you’re simply more interested in how RF works and want to dig deeper into frequency analysis, this application is compatible with the 900x, 2.4x and DBx hardware.
All three applications I tested (Chanalyzer, Pro, and Lab) required no obnoxious considerations and were very straightforward to install. There were no special drivers required on my Windows 7 VM running in Fusion on a MacBook Pro. In this configuration, the Windows OS has no direct access to the wireless card in my MacBook so I was unable to retrieve local WiFi data while using the product. Those using BootCamp to natively run Windows on your MacBook shouldn’t run into this problem but us Fusion/Parallels users are out of luck on this particular featureset until we get an OS X native version of the Chanalyzer applications. Those familiar with auto-device classification found in higher end PC based spectrum analyzers will find this particular feature missing from the Chanalyzer lineup. This ability to ‘set it and forget it’ to gather a running tally of interferes is one of the most significant features missing from an otherwise fairly complete product lineup. Given that these other analyzers typically range into the $2-3k+ range, it’s entirely plausible to find compromise for users looking for spectrum analyzers and can be flexible with their requirements.
In all, the DBx is an excellent product for the vast majority of those people looking to get data about their 2.4 and 5GHz spectrums. The flexible application approach give users the ability to make a minor investment upfront in the hardware and grow as they can justify it. While the Wi-Spy may not be appropriate for those few outstanding enterprise environments that require additional integration or those looking to automatically classify sources of interference, it is a perfect tool for those environments that don’t have newer infrastructure devices that can give them insight into their spectrum but don’t want to break the bank on some of the ‘big-boy’ analyzers. The folks at MetaGeek have done a graceful job of putting some very powerful tools well within the reach of those that are looking to jump into the wireless game or are looking to augment their personal toolkit with gear that does something that would otherwise be unavailable to them.
Full disclosure: I was a delegate for the first ever Wireless Tech Field Day event organized by Stephen Foskett and GestaltIT This event was sponsored by Meta-Geek as well as other presenters including payment of accommodations for all delegates. Evaluation product was distributed to delegates for hands-on exposure for this review. Professionally, I work for a VAR which provides services for industry leading technology manufacturers. The views expressed on this blog are my personal opinion and do not necessarily reflect opinions my employer.

Who said 5GHz was ‘clean’? :)

Here I am at home today being a good survey engineer and making sure all of my tools are in proper working order prior to going out and having to rely on them for the week when all of a sudden, I’m presented with the following anomaly when I’m exercising my trusty Spectrum Analyzer:

Those of you that are familiar with Spectrum Analysis in general usually expect to see something this bad (high duty cycle) in the 2.4GHz spectrum but not the mid-5GHz spectrum! Having just reloaded my laptop with Windows 7 and installed Service Pack 1, I was in the ‘let’s test it all’ mode to make sure nothing unexpected happens. At this point, I was pretty blindsided by the obnoxious noise happening and the ‘Generic – Fixed Frequency’ tag wasn’t helping me any. At a loss for what this could be since I live an acre away from my nearest neighbor and several miles from the nearest airport, I pinged a few of my friends. They suggested the usual suspects – MRI machine, TDWR, neighbors, etc all of which I explained away by location. Being that TDWR is in theΒ 5470-5725 frequency, I changed my card over to 5.725 – 5.850 and after some time got this equally disturbing read:

At this point, I started to suspect my Spectrum Analyzer since I was using a non-Cisco branded Spectrum Analyzer card with the Cisco Spectrum Expert software (the card I was using had the Cognio components that Cisco purchased and re-branded as their own). So I grabbed a copy of the card manufacturers software to rule out in compatibility and I got the same results.

At the end of the day, I was able to swap in a Cisco branded SA card and my results normalized. Clearly I have a flakey (old) SA card that was giving me improper readings. Lessons learned:

  • Always test your tools and keep them in good working order
  • Don’t assume that your tools are telling you the truth. If you see something suspect, dig into it and validate against another source
Now I’m sure that I have a good card in hand I can go confidently into my week and knock this survey out of the park!

New survey rig!

So, it’s been a bit since I’ve been out on a survey proper (not sure if that’s good or bad) and a while back I got some new components in for my rig. I was debating on retrofitting my trusty black Pelican 1510 case with new foam or getting a new one. Never one to spend needlessly, I trickle-down upgraded someone else with my old case and opted for a shiny new tan colored case – As far as I know, I’ll be the only one on our survey teams for the foreseeable future with a tan case so it should make it easier to tell mine apart. πŸ™‚ So, a new Pelican case, a new battery for my Terrawave survey pack, a shiny new Cisco 1142, and some various other bits an pieces all get massaged into the pick-and-pluck foam of the kit. Revisiting the way I hang my AP during the survey was something I’ve been meaning to address for quite a while. I opted for the 2x 90 degree painter pole arms and a drywall finishing brush (sans bristles) and some good old fashioned drilling to assemble a pretty graceful looking mount:

The intermediary piece attached to the factory mount bracket is the brush head that I picked up from The Home Depot in their drywall finishing section:

Home Depot – Drywall Stippling Brush

After ripping out the bristles, a choice few holes later and my mount was ready! Next to place the battery and AP + mount in the bottom of the Pelican case and outline the pick-and-pluck:

Here is what the bottom of the Pelican looks like with the components nestled in – I coiled my CAT5 network cable around the mount and laid in the two 90 degree arms:

Add a top layer with some space for my spare laptop batteries, the AC adapter and some survey cards and call it just about done:

Now I’m off for a week of surveying!